1. Stitching Doodles – straight stitching
Fabric: black felt
Stabilizer: black felt
Foot: open toe darning
Feed dogs: down
Stitch length – 0
Stitch width – 0
Thread: red cotton. Black bobbin thread
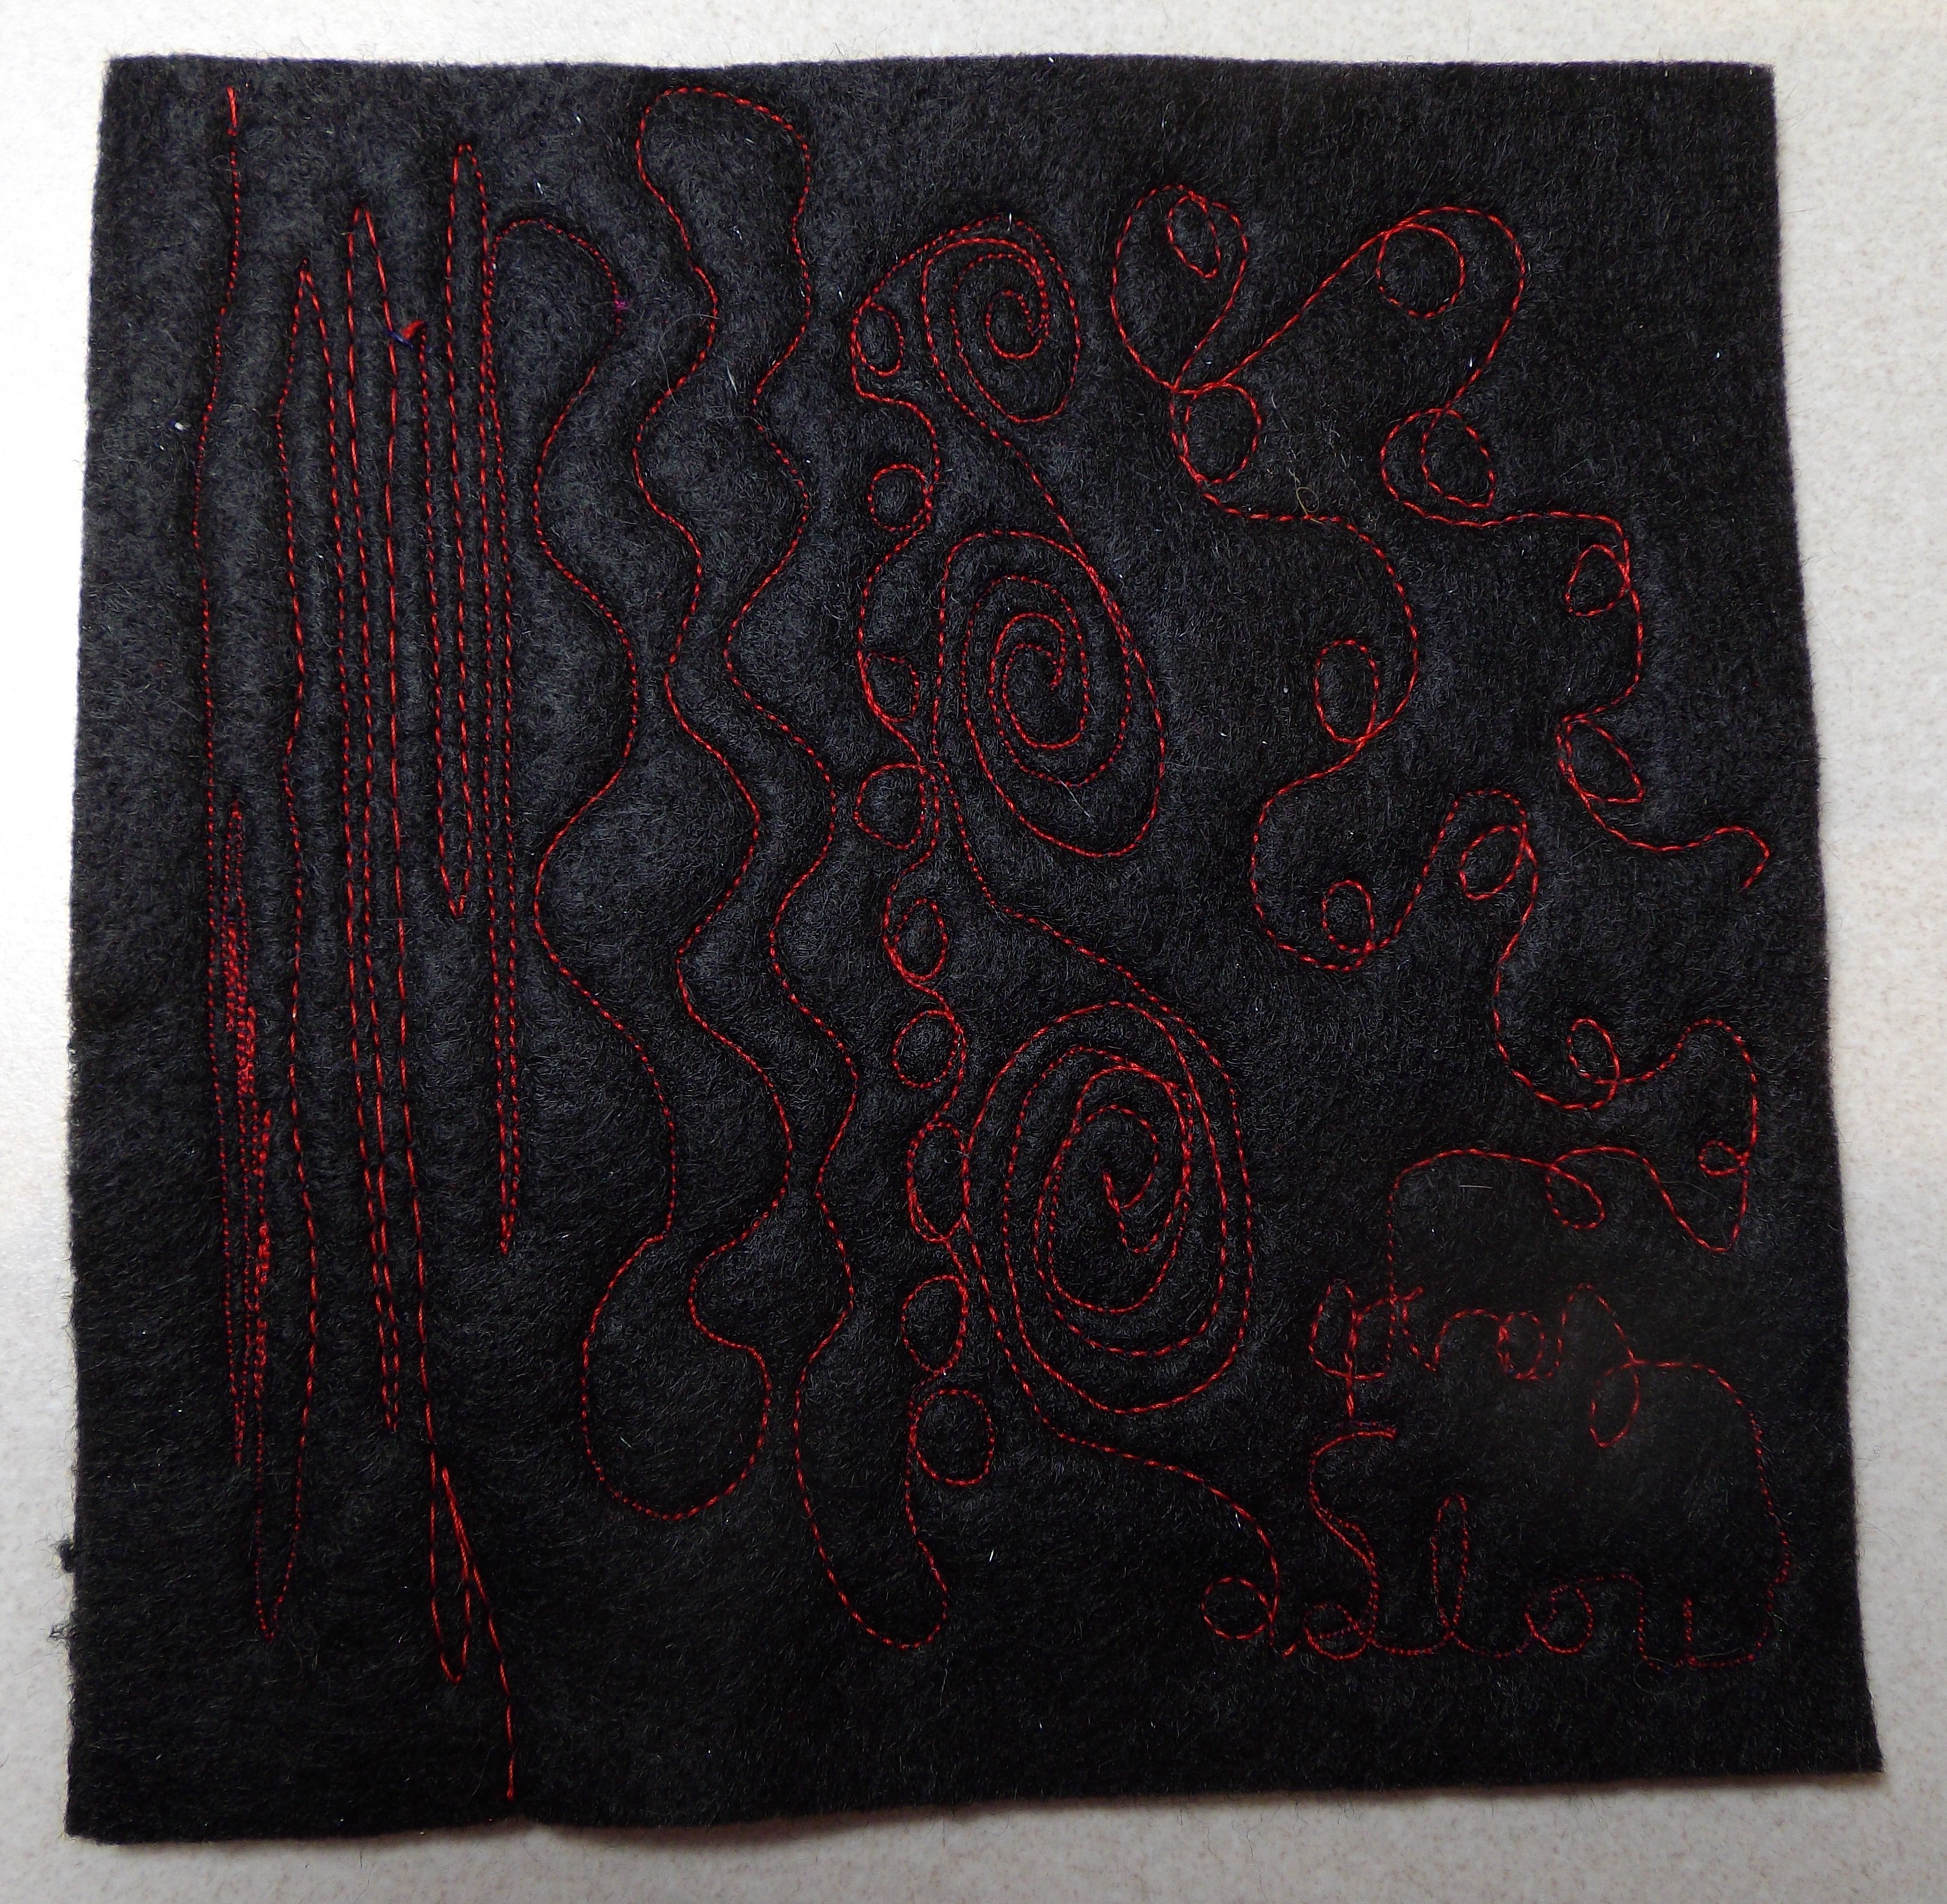
Stitching straight lines, curves, circles, spirals and swirls. I have more control of stitch length if I sew fast and move the fabric at a consistent speed. This is the challenge! The red thread disappears into the black felt. It shows up more in the photo than in actuality.
Photos of circles and curves


I love the movement in this ad
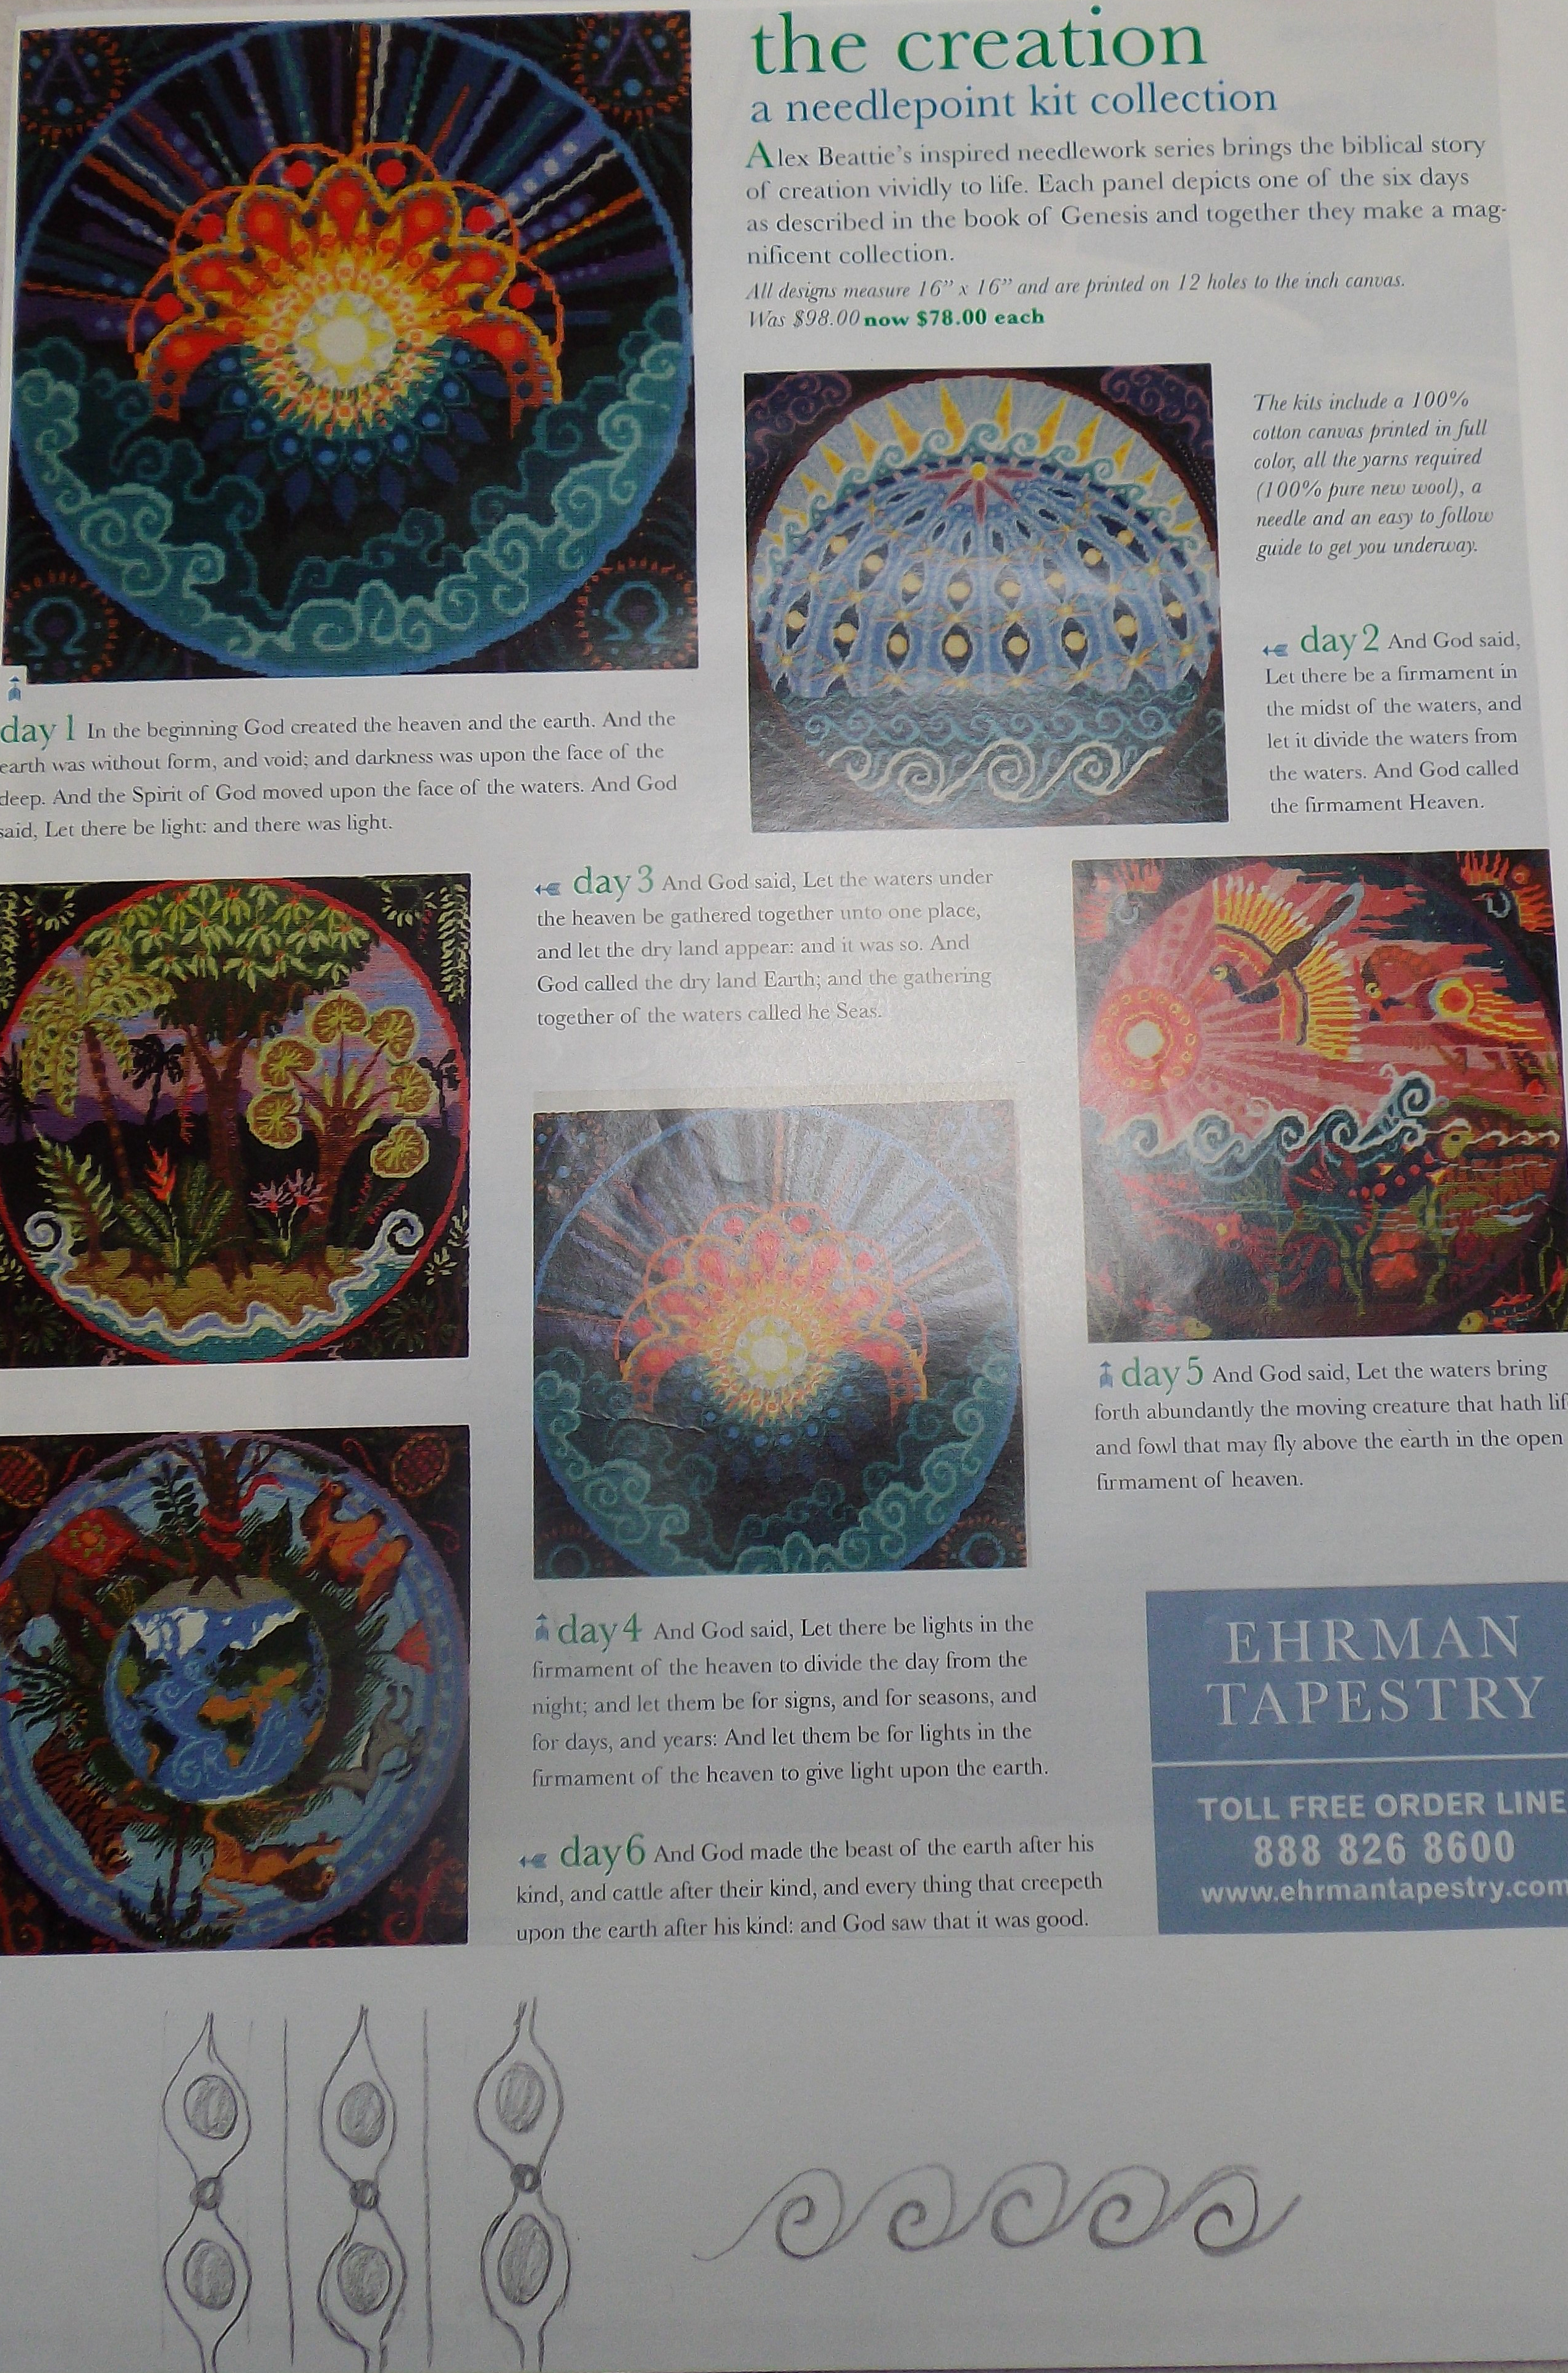

I used the orange flower from the orange page in lesson 1 as a design source
2. Stitching a Circle design – straight stitching.
Fabric: black felt
Stabilizer: black felt
Foot: open toe darning
Feed dogs: down
Stitch length – 0
Stitch width – 0
Thread – sewing cottons and polyesters. Black bobbin thread

The primary colours are in the center of the design. The red is the strongest, the yellow almost disappears and the blue around the yellow is just a shadow. I added the complementary colours to the stitching in the corners. The design became much more symmetrical than the orange flowers that were the design source. It became a pattern rather than a representation of the flowers, especially with all the colour changes. To make the colours visible on the black felt, I found I needed to go over the lines of stitching several times
The stitched results are too busy for my taste, but I rather like the design.
3. Stitching a Circle design – zigzag stitching.
Fabric: black felt
Stabilizer: black felt
Foot: open toe darning
Feed dogs: down
Stitch length – 0
Stitch width – varied depending on the effect I wanted
Thread – # 30 cotton with matching bobbin thread colours

The thread colours show up more when the stitch has a width, but I had to sew slower to get an even coverage of the zigzag. To make the spirals, I had to use move the fabric sideways to achieve the slightly wiggly line. I like the colour impact of this sample, but the delicacy of the straight stitching sample.
4. Using free embroidery and straight stitch without a frame – “razzle dazzle”
Fabric: black felt
Stabilizer: black felt
Foot: open toe darning
Feed dogs: down
Stitch length – 0
Stitch width – 0
Thread – sewing cottons and polyesters. Black bobbin thread


My drawing is much more centered than the stitching. I have not judged the distance very well. I can write more tightly than I can stitch! I stitched the blue four times in order to get the colour to show through. The purple almost disappears. The colours fade into the black felt.
I can see that if I am doing free motion lettering, I would need to practice or warm up first on scrap fabric before I tackle the lettering on my project.
5. Using zigzag stitch and free embroidery in a frame – “razzle dazzle”.
Fabric: white stretch velvet – transfer painted
Stabilizer: 4 layers Armo-intra face #6140
Foot: open toe darning
Feed dogs: down
Stitch length – 0
Stitch width – 3.5
Thread – Rayons and polyesters. White or matching bobbin thread

I had a large piece of the velvet (8 ½” x 11”) and just kept moving the hoop to fit more words in – so my sample ended up quite large! My letters are quite large. I used the pinks and blues as thread colours with some green threads for accent.
Zigzag stitches give a greater impact than straight stitching if you want a design to have a good impact.

Hi Barbara ….. Yeh ….. chapter 7 is done …… congratulations!!!! You are fast catching up!!!! Diana